So, to recap....Glee this Tuesday, Card Club next Tuesday!!
Monday, May 23, 2011
FYI - and mine too!
Okay, I realized yesterday that I was looking at the wrong calendar when I said that club was this Tuesday!! So sorry! It's actually the 31st (next Tuesday)! So, if nothing else, that means we all get to watch the season finale of Glee! Everyone is welcome to come squish onto my couch and we can make some popcorn and watch it together! ;-)

Saturday, May 21, 2011
Father's Day Fun
So what did everyone think about all our season finales this week? Did anyone watch Private Practice??? All I can say is OMG! How about Castle!?! I can't believe they're going to make us wait until the fall to figure out what's going to happen! I'm definitely looking forward to Glee this week, although technically I'm going to miss it when it airs because of club...we could all skip the card making and hang out in my living room to watch the season finale together! ;-)
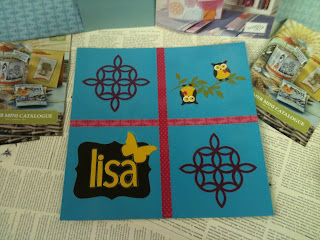
Now, on to our Father's Day project for both of my clubs this month...we're going to be working on creating a Father's Day gift so that we're all ready for the big day! I have to admit, there was very little original thought put into this. :-) I really loved the project featured in our new Summer Mini and decided that we should all have one to call our own!

So, for my ladies in both clubs...I've bought the frames already - it'll be $2.25 for the frame. If you want to use your own frame that's fine, you'll still get to make the "picture". Also, if you have a picture of you and Dad or your kids and Dad that you want to bring with you that's great - just note that it's a 5x7 picture so you can use a 4x6 as long as it is in the portrait mode, otherwise you can bring a 5x7 but you will crop both into about a 2.5x5 picture. If you don't have a picture available at club it's fine, you can always add one at home.
For our other projects our Saucy Stampers (last Tuesday of the month) will be creating a mini album using envelopes and tags; my Stampalicious Ladies (second Tuesday of the month) will be creating their "placemats". (I don't have any pictures of the mini album yet).
Last weekend I spent quite a bit of time playing in my craft room! So fun, and so rare! I was just having an inspired weekend; here's a look at some of the cards I created...
Another card inspired by our Summer Mini...

I particularly liked this card, I cased it from the following blog: qbee's quest. It 's really fun, I didn't have most of the flower punches that she used in her card but I was able to use some of my other punches to create the flowers.


This card was inspired by another card my friend, and customer, Tracey showed me. It's super fun! It's a spinner card, you use pennies to make the cupcake (or whatever) roll back and forth across the card.

My Stampalicious Ladies asked me to create a birthday card and a wedding card so I did, here they are...

I cased the wedding one from Lynn Johnston, a fellow Stampin' Up demonstrator. I changed it a little to make it my own, I put it on Cherry Cobbler, and used the Top Note on the inside, along with the "Happy I Do Day" stamp.

For our birthday card, I was inspired by one that my leader, Kristyne Brandt made with us back when I was just a Stampin' Up customer...I took the idea of her pop up card and changed it to make it birthday-like and festive, I used the Owl Punch as our pop up feature. I have to say, I really love this card...I think it's fun and fabulous!
The last thing I've been working on lately is a variety of wedding invites...I'm actually thinking about advertising my services to create wedding invites, programs, guest books, etc as a side business. Many of these samples were inspired by Angela McKay (another fellow demonstrator).


If anyone wants a consultation or has a friend looking for help creating their wedding invites, etc. let me know! :-) I'd love to work together, brainstorm, or ease the brides' stress level by taking that task off of her hands!!
The last thing I went to mention is my new challenge for myself...I'm loving my card making but am missing scrapbooking so I've decided to challenge myself to scrapbook at least one page every Saturday. It's going to officially be declared Scrapbooking Saturdays! I challenge all of you busy ladies to try and challenge yourselves to scrapbook on a regular basis too! I'll post pictures of my pages as I create them!

This is my most recent page, a page I created of Addie in Mexico last Christmas, these pictures made me laugh because in the course of about 1 minute she went from content to miserable to happy again. She's my sweet little bipolar baby!
*Sorry the pics are so dark...I took them all with my iphone this evening.
Talk to you all soon!!
Thursday, May 5, 2011
Paypal is up and running!! Yahoo!!
Well ladies, (I say ladies because I assume that the ladies are the only people who actually read this blog - who knows, I could be wrong!!)...anyway! I think I officially have my paypal button up and running. So, for any of you who wanted to pay for the Friday Night Lights workshop with your credit cards you should now be able to! Could you maybe drop me a line when/if you do so that I can double check to make sure everything is working the way it should on my end!?! Thanks so much and I'm looking forward to a fun evening tomorrow night!
Saturday, April 23, 2011
Life...insert sigh here!
I have to say some days are better than others, and some days are just freakin' tough! This past week was definitely a tough week for me. I'm not sure what made it worse than others but it was just mentally draining! I'm really beginning to feel the need for summer break - thank goodness for two months off, I swear we teachers need it to build up enough stamina to take us through the next year. Anyways, enough about that!
For those of you waiting for my paypal button to go with the last blog entry, I promise you I am trying! I even dragged poor Paul into it but no matter what we do we keep getting error messages. I've finally given up and begged my blog-guru, Heather (from blogsbyheather.com) to help so hopefully it will be up and running this week!
We had such a lovely day here, hopefully all of you enjoyed your Saturday off, blue skies and sunshine finally returned to Winnipeg today and it was soooo very nice that it was Saturday and not Sunday today! Gotta love a three day weekend! I spent the day crafting with my sister-in-law, Tammy, while our husbands took the kids to the museum! It was quite cute, all 5 cousins (ranging in age from 2.5-10) running around, dancing and just generally enjoying each others company. I have to say, us Mommies enjoyed our day too! Thanks hubbies!


As for Stampin' Up stuff, I'm prepping for card club (this Tuesday) tomorrow. And, stay tuned because I'm planning an exciting scrapbooking based workshop for sometime soon, but I'm still working out the details so I'll keep you posted! Happy Easter Sunday everyone, hopefully you get good chocolate from Mr. Bunny!
Thursday, March 31, 2011
Friday Night Lights -Mother's Day Project
Okay ladies, I'm ready to unveil my exciting new workshop. I have to say, I'm sooo excited about this - I hope you all like it as much! I don't know if I'm the only person in the world who struggles with buying gifts for other people but I have a feeling I'm not. I was trying to figure out a nice way to incorporate Stampin' Up into Mother's Day this year, thinking about what type of Mother's Day card we would create in my clubs and Stamp-a-Stacks and while browsing online I saw another demonstrator who was holding a workshop to create a little basket with cards and I thought "Aha! That would be perfect!" and so, here it is:

When: Friday, May 6th @ 6:30pm (just in time for Mother's Day on Sunday!)
Where: My place


 **If you order the workshop with product you will receive a discount on the cost of the workshop ($10 off when you order the punch and stamp set, $5 off when you order the punch or stamp set).
I hope everyone out there gets as excited about this project as I am! If you want to register please leave me a note in the comments section of this blog or email me at lisaferguson@rivercitystamping.com. If anything about the details was confusing or unclear please feel free to ask me questions!
I'm so looking forward to creating this lovely gift with you and am hoping that Friday Night Lights projects might become a semi-regular part of our lives! Now, I'm off to hunt down some supper and maybe a new ottoman!! :-)
And then I thought, well, there might be ladies out there who would love to give this basket to their mom's but might not think that was enough of a present (I'm famous for this, I always feel like I need to add a little something more) so I thought, "hmmm, what else could we do?". Well, for those ladies who think their mom is going to love this and want to make it herself why not give mom the basket and the stuff needed to make it. So, for those who are interested you can purchase the workshop and the punch and the stamp set (or a variation of that - see details below). Every card in the basket was made using the Build a Cupcake punch or Create a Cupcake stamp set.  The punch and stamp set are both from our Occasions mini catalogue which ends on April 30th so if you want to purchase the workshop and punch/stamp set I'm going to need people to register by April 15th (this also allows enough time for Stampin' Up to ship our product in time for Mother's Day). If you just want to participate in the workshop you can register right up until May 5th (or until I run out of space). So, here's a breakdown of the details...
When: Friday, May 6th @ 6:30pm (just in time for Mother's Day on Sunday!)
Where: My place
Who's Invited: Everyone who wants to give their mom a lovely homemade gift this year.
Cost: There are four different ways you can register for this workshop...1. Just the workshop: $25.00
2. Workshop & Build a Cupcake Punch & Create a Cupcake stamp set:
Wood: $78.99
Clear: $69.09
3. Workshop & Build a Cupcake Punch: $49.51
4. Workshop & Create a Cupcake stamp set:
Wood: $54.43
Clear: $44.58
**If you order the workshop with product you will receive a discount on the cost of the workshop ($10 off when you order the punch and stamp set, $5 off when you order the punch or stamp set).
I hope everyone out there gets as excited about this project as I am! If you want to register please leave me a note in the comments section of this blog or email me at lisaferguson@rivercitystamping.com. If anything about the details was confusing or unclear please feel free to ask me questions!
I'm so looking forward to creating this lovely gift with you and am hoping that Friday Night Lights projects might become a semi-regular part of our lives! Now, I'm off to hunt down some supper and maybe a new ottoman!! :-)
Wednesday, March 30, 2011
Woot, woot, gotta love a good cupcake...
So, we're mid-way through Spring Break (insert big sigh here) and I'm well on my way to achieving my "get organized during Spring Break" goal. I spent today prepping for the April 16th Stamp-a-Stack and I've got to say, if you ain't gonna be there you gonna be sad!! Sorry for the poor English, it just seemed like that was the right way to make that statement. :-) Okay, so let's start at the beginning...I'm planning my third Stamp-a-Stack for April 16th. The first one I hosted was in February and was a bit of a gong show. The next one was in March and other than the fact that I hadn't finished prepping for it as of an hour before it started it went much more smoothly. So for April I wanted to be totally organized and on top of things, hence my "get organized during Spring Break" goal. I decided that I wanted to showcase the cupcake punch and stamp set from our current mini (ending on April 30th). When I first saw the punch and stamp set I thought they were cute but figured, really, how many cupcake cards does a person need to make. Well, how ignorant I was because let me tell you ladies, there is sooooo much more a person can do with these lovely cupcake toys. So, without further ado here are our April 16th Stamp-a-Stack projects...  Our first card incorporates the cupcake punch (and stamp set) and yet takes it someplace completely different, using the bottom of the cupcake as a bucket to hold popcorn, and the top of the cupcake is the background of the popcorn. This card was created by one of the ladies on my Stampin' Up team and was sort of the jumping off point to get me inspired to use this set in all sorts of different ways. (Unfortunately there's no name on the back and so I'm not sure who created it.)


Our first card incorporates the cupcake punch (and stamp set) and yet takes it someplace completely different, using the bottom of the cupcake as a bucket to hold popcorn, and the top of the cupcake is the background of the popcorn. This card was created by one of the ladies on my Stampin' Up team and was sort of the jumping off point to get me inspired to use this set in all sorts of different ways. (Unfortunately there's no name on the back and so I'm not sure who created it.) Our second card is going to be in honour of Easter. Again, we're using the cupcake punch and stamp set to create little Easter baskets which we will then fill with colourful eggs (the "eggs" are created using the smallest heart from the Heart to Heart punch and dsp from Sale-A-Bration). The fluffy white clouds are the tops of the cupcakes from the cupcake punch.
Our third card is again using the cupcake punch to create the hot air balloon basket, and the clouds. The "grass" is dsp from Sale-a-Bration (for those who are going what the firetruck is dsp, it means Designer Series Paper). I saw this idea on line at the Stampin' Up demonstrator idea board (Stampin' Connection) and fell madly in love with it. There were several super cute examples but in the end I decided to go with this one. I love, love, love it!!
Now, as productive as I was today I was not able to complete the fourth card yet (not because I'm lazy but because I don't have all the supplies). So, there will be a fourth card for the Stamp-a-Stack and we will actually be using the cupcake punch and stamp set to create a card with a cupcake on it! Just for something different! ;-) Our final card will be bright, spring-inspired colours and will be a Mother's Day card. I may post pictures of it later (once my order arrives) or I might just leave that one as a surprise for my ladies at the Stamp-a-Stack...we'll see.
In the midst of prepping for the Stamp-a-Stack I spent some time playing with the set and creating other projects, the picture below shows a bunch of them all together.
Now, look closely at the picture...do you see the Early Espresso cupcake basket on the right hand side of the picture (when you're looking at it). This is, I think, the most funnest (I feel like Winnie the Pooh there) project yet!! I'm putting out a call for ladies who would like to get together and create a beautiful, hand-crafted, heartfelt Mother's Day gift for their deserving mom's (or friends, sisters, co-workers - whatever!). I'm planning my first ever Friday Night Lights bonanza. On May 6th, in time for Mother's Day, we will meet at my place and create a lovely basket filled with a variety of homemade, and adorable, 3.5x3.5 cards.
I will have more pictures and a price for this fabulous class posted tomorrow! If you want in please leave me a note in the comments, email or facebook me or you can even be old fashioned and phone me!
Just a few other little notes, I was prepping all my ribbons for my ribbon club and was struck by how pretty they all looked all jumbled up together and it made me want to take a picture of it, so I did! And it was a good thing I looked at them all again because it made me realize I had completely forgotten to give my ladies Pumpkin Pie ribbon - a travesty! (And Tam, I have your Pumpkin Pie ribbon sitting on my desk!)

(These cards are two of the projects from the March Stamp-a-Stack, all using the level 2 hostess set, Fast and Fabulous)
 One last picture before closing tonight...spring in Winnipeg! Everyone gets the itch to be outside doing outside type things. In Addie's case she was desperate to use her new bike that Grandma gave her for Christmas, seeing as outside is muddy, snowy, icy and just generally yucky we put on her helmet, put baby in the back seat and lampchop in the basket and tooted around in the basement. It was almost as good as the real thing!
So, check back in tomorrow for all the details about our Friday Night Lights - Mother's Day event and some more pretty pictures.
Tuesday, March 8, 2011
Tuesday night and all is right...
I'm sitting here looking at the clock on my computer going, I should really go to bed...but maybe I'll just do a quick blog entry! It's such a shame that the Manitoba Education system doesn't arrange to have school start at like 10am - it would really suit my night-owl tendencies so much better (and what teenager wouldn't benefit from an extra hour or two of sleep in the morning?).
I had card club tonight and it went really well. It's funny, when I started this business it would take me a few days (and at least a couple of hours each time) to prep for card club. Now, I can pull it all off in an hour or two and I think the projects are always so much fun! It's nice that it's not so stressful anymore. Here's what we did tonight...(both of these projects were cased from my Stampin' Up leader, Kristyne Brandt - thanks Kris, they're delovely!!).
This card was created using the Apple Blossom stamp set, I'd never actually played with it before but I really love this card. I think it is so very sweet! Everything (except the ribbon) is using the In Colours and I just popped a few pieces off the page using dimensionals. Super fun!

Isn't the owl soooo very cute? I had lent (is that a word? I don't think so, loaned?) my medium size scallop punch to my sister-in-law because I had a totally different plan for tonights club and then my order didn't arrive until tonight and so I had to scrap that and do something different so I ended up using the large scallop and giving him wings, which I think is still completely adorable.

I had card club tonight and it went really well. It's funny, when I started this business it would take me a few days (and at least a couple of hours each time) to prep for card club. Now, I can pull it all off in an hour or two and I think the projects are always so much fun! It's nice that it's not so stressful anymore. Here's what we did tonight...(both of these projects were cased from my Stampin' Up leader, Kristyne Brandt - thanks Kris, they're delovely!!).
This card was created using the Apple Blossom stamp set, I'd never actually played with it before but I really love this card. I think it is so very sweet! Everything (except the ribbon) is using the In Colours and I just popped a few pieces off the page using dimensionals. Super fun!
Isn't the owl soooo very cute? I had lent (is that a word? I don't think so, loaned?) my medium size scallop punch to my sister-in-law because I had a totally different plan for tonights club and then my order didn't arrive until tonight and so I had to scrap that and do something different so I ended up using the large scallop and giving him wings, which I think is still completely adorable.
The other great thing that happened today is my (very big, very expensive) Stampin' Up order finally arrived today!

I love when I get home from school and there are Stampin' Up boxes on my front porch - it makes me happy! It's sort of like Christmas, and this order especially because usually everything is for my customers but today most of this was for me - although I'll be using most of it in club/stamp-a-stack projects so I guess it's still for my customers but whatever!
Well, I do have to teach tomorrow and I was pretty much braindead (see! again, how do you spell that?) today so I should probably stop playing on the computer and go to bed! To quote my daughter..."Tata for now, kisses!"
Saturday, February 26, 2011
Sunday Delights
Don't you love those moments when the little one is taking a nap and you're sitting quietly in your craft room (or where ever your peaceful spot is...in the summer it would be under the tree in the backyard), just taking a moment? I swear, somedays I live for those moments.
*I know it's not Sunday anymore but I'm posting this anyway, dang it! :-)
*I know it's not Sunday anymore but I'm posting this anyway, dang it! :-)
Wednesday, February 16, 2011
Hmmmm....
I'm sitting here trying to figure out what to order because my Stampin' Up supplies are dwindling with all the clubs and stamp a stacks and other super fun things that have been going on. I made my list and was super pumped and now I'm stuck. Why, you ask. Well, I'm not even half way through ordering every thing I need to head into the next several months of fun times and I've already pretty much doubled the amount I had budgeted. Dang it all! Now I'm going to have to rework everything. Don't you all wish that you were just super rich and could buy everything you wanted when you wanted it? I know I do! :-)


This super fun Owl card was cased from DarleneDesign.com and again we had so much fun. This one is definitely my favourite!
In the meantime I'm also starting to plan/order for my next Stamp a Stack! I'd say this one was hugely, chaotically successful! Here are the different projects that we made at our stamp a stack. Most of which are lovingly cased from other super talented ladies.
This side-step card was cased from one of the ladies on my Stampin' Up demonstrator team, The Prairie Dolls, Christa. She did hers with the Create a Cupcake set; all of the ladies at the Stamp a Stack loved the look of this card.
This super fun Owl card was cased from DarleneDesign.com and again we had so much fun. This one is definitely my favourite!


This next card was inspired by something I saw on The Stampin' Connection. I gave it some twists to make it my own and I went with a Wedding theme because my friend/sister-in-law Marleen is going to a very fancy wedding soon and I thought she might like to have a card for it.


This last card was again cased from DarleneDesign.com. That is one talented lady! I really loved how this card turned out, it was so simple and yet it's so pretty! We just glued strips of paper onto a piece of cardstock, ran it through the Big Shot using the Top Note die cut and then did a little doodle work around it and voila! The heart embellishments were actually made by punching each heart out 5-7 times in the same paper, gluing each layer together and then covering the whole thing with a fairly thick layer of Crystal Effects. All done just in time for Valentine's Day!

All in all it was a fun first Stamp a Stack and I fully intend to do it again and again!
Monday, February 14, 2011
Happy Valentines Day!!
I'm in the midst of report cards and so really don't have time to say much, but I do want to say Happy Valentines Day everyone!!
Sunday, February 6, 2011
Wow...it's been a while!
Well, life has been super busy. Since September 1st we've: sold our home; celebrated Addie's second birthday (yes those are tractors on her cake - what can I say, she's the perfect mix of tom boy and girlie-girl);
 moved to the cottage (cheers to the 4 hour drive every day - not) - and Addie made the move into a big-girl bed with next to no fuss!;


 moved from the cottage into our beautiful new home (10 days before Christmas - and on my birthday) - it didn't look like this when we moved in, thank god!

 We celebrated Christmas and New Years;
 hung a microwave, at least 19 curtains/blinds around the house, multiple pictures; built a table and four chairs, one shelf, and four stools.
moved to the cottage (cheers to the 4 hour drive every day - not) - and Addie made the move into a big-girl bed with next to no fuss!;moved from the cottage into our beautiful new home (10 days before Christmas - and on my birthday) - it didn't look like this when we moved in, thank god!But the garage actually did look like this on moving day!! It was insane!
We celebrated Christmas and New Years;hung a microwave, at least 19 curtains/blinds around the house, multiple pictures; built a table and four chairs, one shelf, and four stools. All the while I've taught about 60 junior high kids science and english, taught one two year old, well, everything; welcomed three card clubs into my new home; started planning my first Stamp a Stack; am mentoring a colleague on Assessment and Reporting; been asked to pilot a new Manitoba Education Science and Literacy program; booked a training session for our new Art Curriculum; started looking into my Masters degree; and been working on about 140 seperate report card comments and percentage marks. Oh, and I'm trying to stay on top of Project 365, One little Word and Yesterday/Today. Holy crow, it's been busy! I'm exhausted! :-)

But, it's also been really fun and exciting. I love our new home, come on over and check it out...we'll put on a pot of yummy hazelnut coffee and copasquat (sit and visit)! I feel like I'm getting good at my card clubs and planning projects and the school year is going fabulously. So, all in all, life is great! I want to start blogging more regularly (I actually think it might be a great way to help me stay on top of my journaling for P365) and I've promised my card club ladies that I would start posting my project instructions here. So, here's a look at what we've been doing since December...


To create this one you start with an 8.5"x11" piece of paper (I tried cardstock but it didn't fold well so I think you need to use designer series type paper - something more lightweight). Cut the paper in half at the 5.5" mark (now you should have two pieces of paper, both measuring 8.5"x5.5". Lay your paper out the long way and score it at the 2, 4, 6, and 8 inch mark. Turn the paper 90 degrees and score it across the bottom at the 2" mark (I think I found it a little helpful to score it at a little less than 2" from the bottom). Cut the 2, 4, 6, 8 inch lines from the bottom of the page up to the 2" score that runs across the page (basically you're going to have 4 little 2" flaps at the bottom of your page when you're done). Decorate and stamp your paper however you want at this point and then apply tape runner to the small .5" flap at the end of your page and 3 of the 2" squares - you're putting your tape ON the decorated side of your page. Now flip your paper to the non-decorated side and put tape on all four edges of your last 2" square. Starting with the .5" strip, stick all your edges together, creating a square tube. Fold all the 2" squares together, the last one will be the square with tape runner on all 4 sides. Pinch the top together, so it looks like a closed milk carton, fill your container with candy, brads, ribbon, whatever and seal the top with whatever you like. We used the extra large, round tab punch.
 This is the other project we made at the club but I'll explain how we did it later (see note below).

My Saucy Stampers club (I don't think they know this is their name but it makes me happy to call them that, they were my first club) came back from a two month hiatus (we skipped October and November because of my move) and we jumped right back into things and created a super fun flip book and a Valentine's card. Here are some pictures and how to's:
Flip Album (cased from Paula Goff on Scor-Pal).
To create this you need to start with one 6"x12" piece of cardstock (we used a variety of colours from the regals family). Score it at 2 3/4", 3", 9", 9 1/4". This is going to form the back cover and bindings for your book.
Cut your paper (we used the Speciality Designer Series Paper - First Edition from the new Occasions mini), into four 5 1/2" x 5 1/2" squares. These will become your front covers. Crease your score lines on your cardstock and glue/tape the 5 1/2" squares onto the front panels of your cardstock. *Make sure to center them and do NOT cover your score lines.
For the meat and potatoes of your book you're going to cut your designer paper (we used the regals patterns designer series paper stack - I do realize that my sample is not using a colour from the regals family but I used up all of my paper with my ladies) into three 5 3/4" by 12" strips. Lay them out in a row on your desk and glue them so that the ends are together (basically you are gluing the 3" flaps to each other). Fold all of the pieces of paper into the middle section. Flip this over and glue the back of the middle section into the middle of your cardstock. Your book is now done and ready for photos, journaling and embellishments
Not only did we make this fabulous flip album (which in my brain would be really cool as a resolution album or a look back at 2010 type thing), we also created this really pretty Valentine's card.
We used the Lots of Love letterpress plate to create the front of the card. I loved using this tool, I think it's because it made me think of working at a newspaper in like the 1920's and how neat that would have been. Word to the wise, once you've ran your paper through the big shot set it aside for a few moments. We used craft ink to get a richer colour but it took a little longer to dry. We then just basically layered our whisper white onto a piece of regal rose, we tied our ribbon around that layer (this ribbon is actually no longer available but I had a lot of it so I decided to be a rebel and use it anyway - shhhh, don't tell!), and then layered it all onto a piece of real red cardstock (the ribbon and ink was also real red). Oh, and for a little extra somethin', somethin', we punched some hearts out of different coloured/patterned papers and used dimensionals to pop them off the front of our card.
So, that was our December 28th club (my Saucy Stampers). For my other club (for whom I haven't come up with a name yet) we did two little love/Valentine type projects at our club at the beginning of February.
Yet again, I pulled out the scor-pal (it's funny, I've owned the thing for like a year and a half and never opened it and now I'm using it like crazy!). Using the same Designer Series paper as we did with the flip book, First Edition, we created this little milk carton container.
This one was also cased from scor-pal (Jen Young) and is called the 2-4-6-8 Favour Box.
To create this one you start with an 8.5"x11" piece of paper (I tried cardstock but it didn't fold well so I think you need to use designer series type paper - something more lightweight). Cut the paper in half at the 5.5" mark (now you should have two pieces of paper, both measuring 8.5"x5.5". Lay your paper out the long way and score it at the 2, 4, 6, and 8 inch mark. Turn the paper 90 degrees and score it across the bottom at the 2" mark (I think I found it a little helpful to score it at a little less than 2" from the bottom). Cut the 2, 4, 6, 8 inch lines from the bottom of the page up to the 2" score that runs across the page (basically you're going to have 4 little 2" flaps at the bottom of your page when you're done). Decorate and stamp your paper however you want at this point and then apply tape runner to the small .5" flap at the end of your page and 3 of the 2" squares - you're putting your tape ON the decorated side of your page. Now flip your paper to the non-decorated side and put tape on all four edges of your last 2" square. Starting with the .5" strip, stick all your edges together, creating a square tube. Fold all the 2" squares together, the last one will be the square with tape runner on all 4 sides. Pinch the top together, so it looks like a closed milk carton, fill your container with candy, brads, ribbon, whatever and seal the top with whatever you like. We used the extra large, round tab punch.
This is the other project we made at the club but I'll explain how we did it later (see note below). Okay, I feel like this is getting boring so I'll give more instructions in my next post. Good to see you all again! Here are some pics of the projects I'll explain next time...


Subscribe to:
Posts (Atom)